

There's a moment that happens in every hardware store when a new product shows up on a pallet and nobody quite knows what to do with it. The item gets scanned in (maybe), someone slaps it on the nearest empty shelf, and it disappears into the store's bloodstream without a photo, without a proper tag, without a par level, and without anyone deciding what it should actually sell for beyond whatever the POS auto-populated.
Six weeks later you're staring at a report wondering why a $14 caulk gun keeps showing "in stock" but nobody can find it, why three SKUs have the wrong price on the shelf, and why you reordered a slow item you never should've touched again.
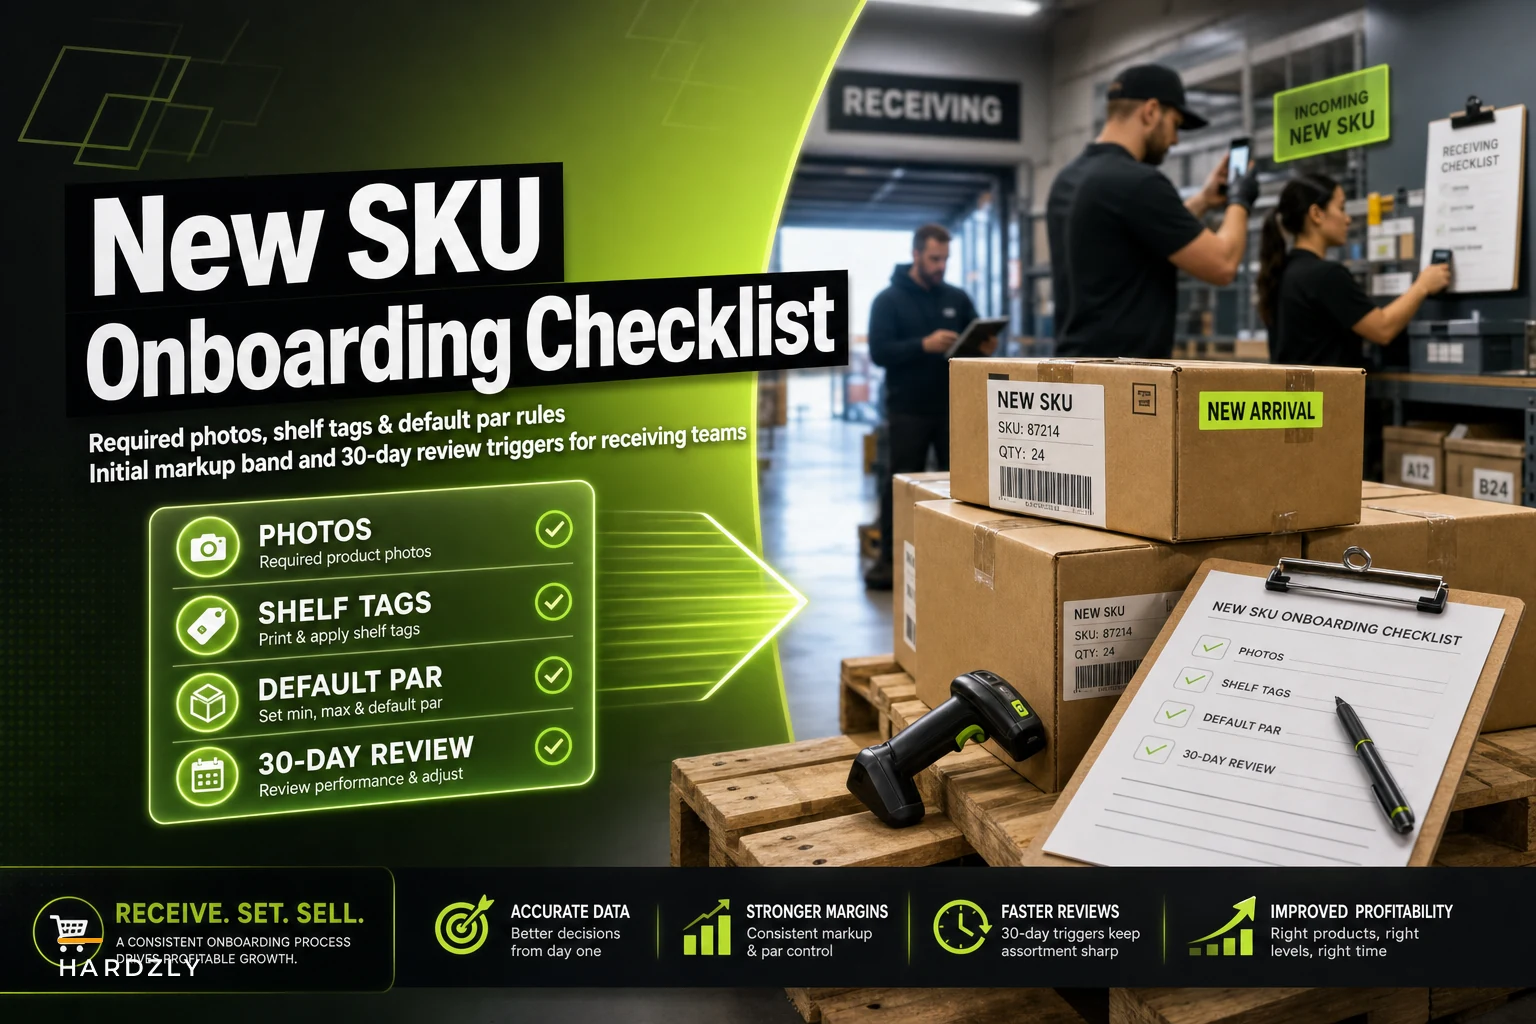
The onboarding gap is quiet and it compounds. This post is a tight, one-page checklist your receiving staff can run on every new SKU — the photos to take, the tags to print, a default par heuristic that doesn't require a spreadsheet, an initial markup band, and the review triggers that catch mistakes inside the first 30 days.
Why new SKUs slip through in the first place
New product onboarding almost always breaks at the receiving dock, not at the buying desk. The owner or manager makes a smart decision to bring something in — then the physical item arrives on a Tuesday morning when two people are covering the floor, a delivery is late, and the counter's slammed.
This usually happens because onboarding isn't a defined task. It's assumed. Everyone thinks "receiving" means checking the box against the PO and getting the item out where customers can see it. Nobody assigned the extra 90 seconds it takes to photograph, tag correctly, and set a starting par. So it doesn't happen.
The other issue is that the person receiving the shipment often isn't the person who decided to buy it. Your buyer knows this new hex-head lag screw is meant to sit next to the structural fasteners and should ring at a 42% margin. The receiver has no idea. Without a one-page handoff, the buyer's intent evaporates the moment the box hits the floor.
A clean product master helps here — if your item records are consistent from the start, receiving has something to check against instead of guessing. We've written about building that foundation in a lightweight MDM system for single-location hardware stores, and honestly, onboarding is where good master data either gets protected or gets polluted.
The one-page onboarding checklist
Keep this laminated at the receiving station. The whole thing should take under two minutes per new SKU once staff have done it a dozen times.
Stop losing sales due to inventory gaps.
Hardzly helps you manage stock levels, orders, and supplier interactions efficiently.
- Unified inventory and sales tracking
- Supplier and purchase order management
- Automated workflow and task scheduling
No credit card required
-
Verify the SKU exists in the system with a real description, not "MISC ITEM" or a raw vendor code. If it's not set up properly, stop and flag it.
-
Take the required photos (details below) and attach them to the item record.
-
Print and place two tags
the shelf-edge price tag and a bin/location tag if the item lives in bulk or back stock.
-
Set the default par using the heuristic below.
-
Confirm the markup band matches the category — don't accept whatever the system auto-filled without a glance.
-
Note the received date so the 30-day review clock starts.
-
Flag anything weird
damaged packaging, wrong pack size, missing UPC, or a price that looks off.
That's it. Seven lines. The rest of this article is just explaining each one so your team knows why they're doing it, which is the part that makes people actually stick to a checklist.
Required photos: three shots, every time
Photos feel optional until the day you need them. Then they're the difference between a five-second answer and a fifteen-minute hunt.
-
The front of the package — clear, readable, so anyone can match the physical item to the record. This is the one that saves you when a customer calls asking "do you carry the blue one or the gray one?"
-
The UPC / barcode close-up — because vendor barcodes get damaged, and having a clean reference image lets you re-scan or manually key without pulling the item.
-
The shelf location in context — a wider shot showing where it actually sits. This is the underrated one. When a part-timer can't find an item, a location photo answers the question faster than any aisle map.
Stores that photograph the location — not just the product — cut "I can't find it" moments dramatically, especially for oddball items that don't have an obvious home. A $9 specialty drain gasket that lives in a random pegboard slot near plumbing is invisible to a new hire. The photo makes it findable.
Attach photos to the item record immediately to avoid losing them or misplacing them in a folders pile.
Don't overthink resolution or lighting. A phone snapshot attached to the item record is enough. The goal is retrievability, not a catalog shoot.
Shelf tags: get them right at intake, not at the next audit
Shelf tag errors are one of those slow leaks nobody notices until a customer points at a tag and says "it says $6.99." Two tags at onboarding kills most of that.
The shelf-edge tag should carry the current price, the SKU, and ideally the UPC in a scannable form. Print it at receiving, not "later," because "later" is where tag mismatches are born. The most common failure: the item goes out on the shelf priced from memory or from an old tag left by the previous product in that slot, and it stays wrong for weeks.
The location/bin tag matters most for bulk items, back stock, and anything stored away from its selling location. If your fasteners live in labeled bins, the new SKU needs its bin labeled the same day. Otherwise you get the classic problem: plenty of stock in the back, an empty peg out front, and a phantom stockout that costs you a sale.
One quick discipline that pays off: when a new SKU replaces an old one in the same slot, pull the old tag immediately. Ghost tags from discontinued items cause more pricing arguments at the register than almost anything else.
The default par heuristic (no spreadsheet required)
You can't calculate a proper par level on a brand-new SKU because you have zero sales history. So don't pretend to. Use a starting heuristic, then let the 30-day review correct it.
A simple band based on how the item was bought and where it sits:
| Item type / role | Starting par heuristic | Reasoning |
|---|---|---|
| Fast-moving consumable (fasteners, tape, common adhesives) | 2× the case/pack quantity | You'll sell through and want buffer against lead time |
| Standard shelf item (hand tools, fittings, hardware) | 1× pack quantity, min 2 facings | Enough to look stocked, not enough to bury cash |
| Slow / specialty / long-tail | Whatever the minimum order was — no reorder par yet | Prove demand before committing to holding stock |
| Seasonal / promotional | Buy quantity only, par = 0 after sell-through | Don't auto-reorder something meant to end |
The thing most stores miss: a brand-new SKU should not get a "real" par level on day one. Setting a par implies a reorder trigger, and reorder triggers on unproven items are how deadstock is born. Let it earn its par.
For categories where you already have velocity math worked out — fasteners, adhesives, that kind of thing — you can be more precise from the start. But for genuinely new items, the heuristic above beats false precision every time.
Initial markup band: match the category, then leave it alone
Your receiver shouldn't be inventing prices. They should be confirming the item landed in the right markup band for its category and flagging anything that looks off.
A simple starting structure:
-
Commodity/competitive items (common fasteners, basic electrical, standard PVC): tighter band, roughly 25–35% margin, because customers price-check these against the big box down the road.
-
Standard hardware and tools
mid band, roughly 38–48%, where most of the store lives.
-
Specialty / low-competition / problem-solver items (odd fittings, repair parts, the thing nobody else stocks): wider band, 50%+, because you're selling availability and expertise, not price.
The onboarding job isn't to set these — your category pricing framework does that. The job is to catch the mismatch. A typical example: a specialty plumbing adapter comes in and the system defaults it to a 30% commodity margin because it inherited a template. That's leaving real money on the table on an item customers will pay for. A 10-second band check at receiving catches it before it sells wrong for a month.
The first-30-day review: five triggers that catch every mistake
This is the part almost nobody does, and it's where onboarding actually pays off. A new SKU is a hypothesis — "customers want this, at this price, in this spot." The 30-day review is where you check whether the hypothesis held.
Run this as a quick pass on every SKU that hit 30 days since its received date. Five triggers:
-
Zero sales in 30 days → Investigate placement, price, and whether anyone even knows it's there. Sometimes it's a great product in a dead spot. Sometimes it's just wrong for your customers.
-
Sold out fast (before you expected) → Good problem. Raise the par from heuristic to a real reorder point, and check whether you underpriced it.
-
Price complaints or register overrides → Tag mismatch or a markup band that's off. Fix the tag and the record together.
-
"Can't find it" incidents → Location problem. Add or fix the location photo and bin tag.
-
Margin below its category band on actual sales → Something's leaking — promo pricing that never ended, a cost that went up, or a receiver who guessed low.
The review isn't about the product, it's about whether onboarding got it right. Most corrections take a minute. Skipping the review is what lets a small onboarding error live in your system for a year.
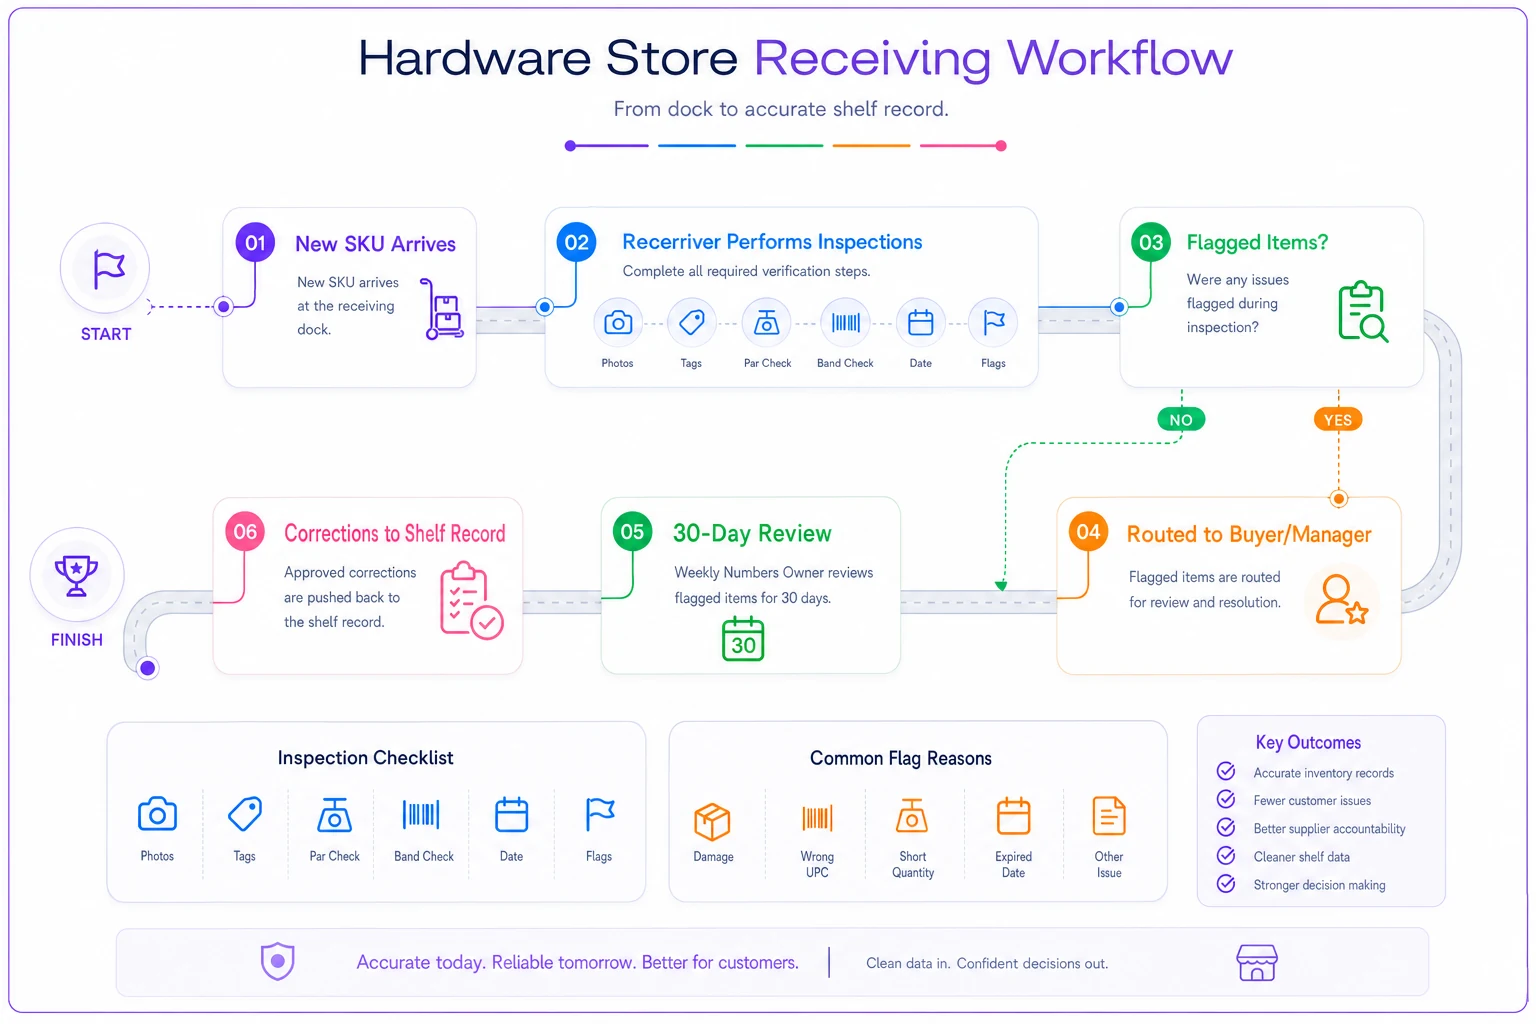
Who runs which piece: a simple workflow
Onboarding falls apart when it's "everyone's job." Split it clearly.
-
Receiver
does the physical checklist — photos, tags, par heuristic, band check, date, flags. This is the two-minute-per-item work.
-
Buyer / manager
confirms flagged items, resolves anything the receiver couldn't (missing setup, weird pricing, damaged pack).
-
Whoever runs your weekly numbers
owns the 30-day review pass and pushes corrections back to the shelf.
This mirrors the same two-person discipline that makes receiving appointments work in the first place — a clear split beats a vague "team handles it." If your dock routine is still loose, tightening the receiving appointment routine first makes onboarding far easier, because you're not trying to photograph and tag new items in the chaos of an unscheduled delivery.
This mirrors the same two-person discipline that makes receiving appointments work in the first place — a clear split beats a vague "team handles it." If your dock routine is still loose, tightening the receiving appointment routine first makes onboarding far easier, because you're not trying to photograph and tag new items in the chaos of an unscheduled delivery.
When this full checklist makes sense — and when it's overkill
When it makes sense: You bring in more than a handful of new SKUs a month, you've had pricing complaints or "can't find it" problems, or deadstock keeps creeping in from items that got reordered on autopilot. If any of that sounds familiar, the two minutes at receiving pays for itself fast.
When it's overkill: If you add maybe two or three genuinely new items a quarter and your team already knows the store cold, a formal 30-day review on each one is probably more process than you need. Do the photos and tags, skip the formal review, and keep an eye on the items.
Who should not bother with the full version: Extremely small operations where the owner personally receives, prices, and shelves everything. If it's all in one head, the handoff problem doesn't exist — though even then, the photos are worth taking for the day you finally hire help.
A real scenario: the phantom stockout
A single-location hardware store started bringing in a line of specialty anchor bolts — good margin, contractor demand, roughly 40 new SKUs across the assortment. Receiving handled it the usual way: scanned in, out on the shelf, priced from the vendor sheet.
Within two months they had three separate problems. A handful of SKUs showed stock in the system but had bulk quantities sitting unlabeled in the back, so the pegs read empty and customers walked. Two items rang up at the wrong price because the shelf tags never got updated from a placeholder. And one slow SKU had auto-reordered twice off a par level nobody meant to set, tying up a few hundred dollars in a bolt that sold maybe once a month.
None of these were huge on their own. Together they were a steady drip — a few hundred dollars in lost sales and dead cash over the quarter, plus the time spent hunting and arguing at the register.
After switching to the one-page checklist, the difference showed up mostly in what stopped happening. Location photos and bin tags killed the phantom stockouts. The band check caught two more items priced too low before they sold wrong. And the 30-day review flagged the slow bolt before it reordered a third time — they zeroed its par and sold through the existing stock instead. Nothing dramatic, just a store that stopped leaking in the same three spots.
Make the checklist stick
The reason onboarding checklists fail isn't the checklist — it's that they live in someone's head or a document nobody opens. Keep it physically at the receiving station. Make the photos and tags non-negotiable, because those are the ones that quietly cost you sales. And put the 30-day review on an actual recurring task so it doesn't depend on someone remembering.
Every new SKU is a small bet. The onboarding checklist just makes sure you can see whether the bet paid off — and fix it fast when it didn't. Two minutes at the dock and one quick review a month later is a lot cheaper than a shelf full of items nobody can find, priced wrong, reordering on their own.
Every new SKU is a small bet. The onboarding checklist just makes sure you can see whether the bet paid off — and fix it fast when it didn't. Two minutes at the dock and one quick review a month later is a lot cheaper than a shelf full of items nobody can find, priced wrong, reordering on their own.
Ready to elevate your hardware store management?
Join 500+ hardware stores using Hardzly to boost operational efficiency, reduce stockouts, and grow revenue.